Interior Guide
How to Measure Your Space for a False Ceiling
A step-by-step guide to getting accurate measurements before your false ceiling installation — so nothing goes wrong mid-project.
Why it matter
Getting the Measurements Right Changes Everything
A false ceiling — also called a drop ceiling or suspended ceiling — can completely transform a room. It hides wires, pipes, and ducts; adds layers for lighting and acoustics; and creates a polished, finished look.
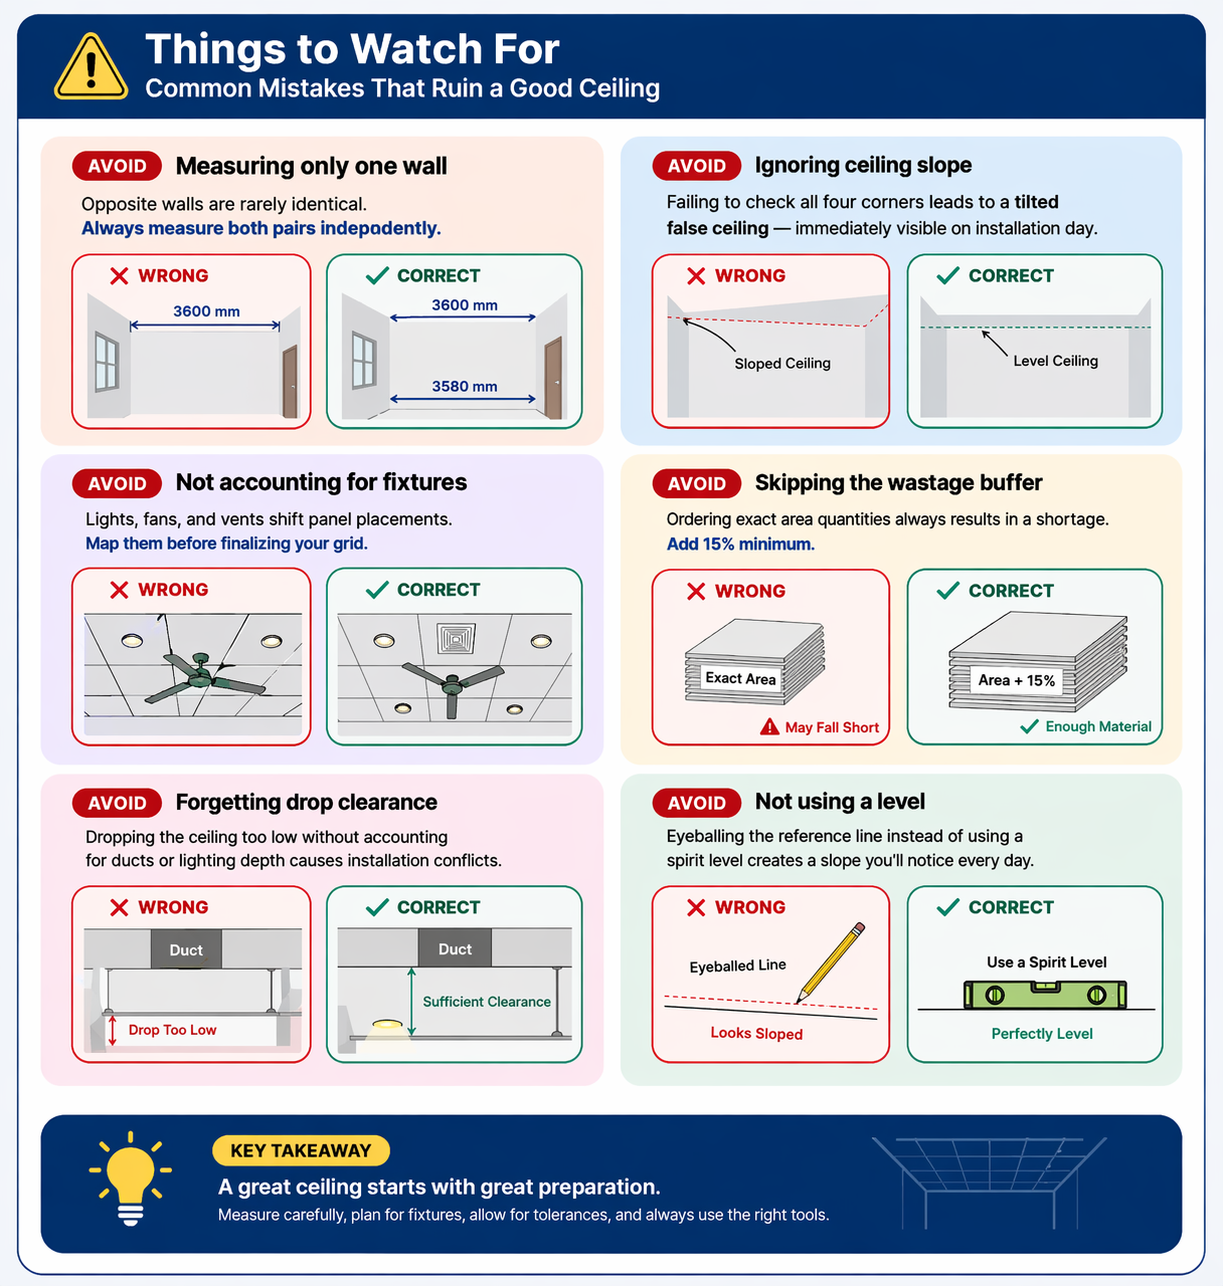
But all of that elegance falls apart if the measurements are off. Incorrect dimensions lead to wasted materials, uneven panels, awkward gaps around edges, or — worst of all — a ceiling that feels claustrophobically low.
The good news: measuring for a false ceiling isn’t complicated. It requires patience, the right tools, and a clear process.

What you need
Tools to Gather Before You Start Start
Precision starts with the right equipment. These are the basics every homeowner or contractor should have on hand before measuring.
Measuring tape
At least 5 meters long for large rooms
Laser distance meter
For fast, accurate room dimensions
Graph paper & pencil
To sketch the room to scale
Step ladder
To measure ceiling height safely
Chalk line or string
For marking level reference lines
Level or spirit level
To ensure a flat reference plane
Step-by-Step Measurement Guide
Mark the intended ceiling height on the walls
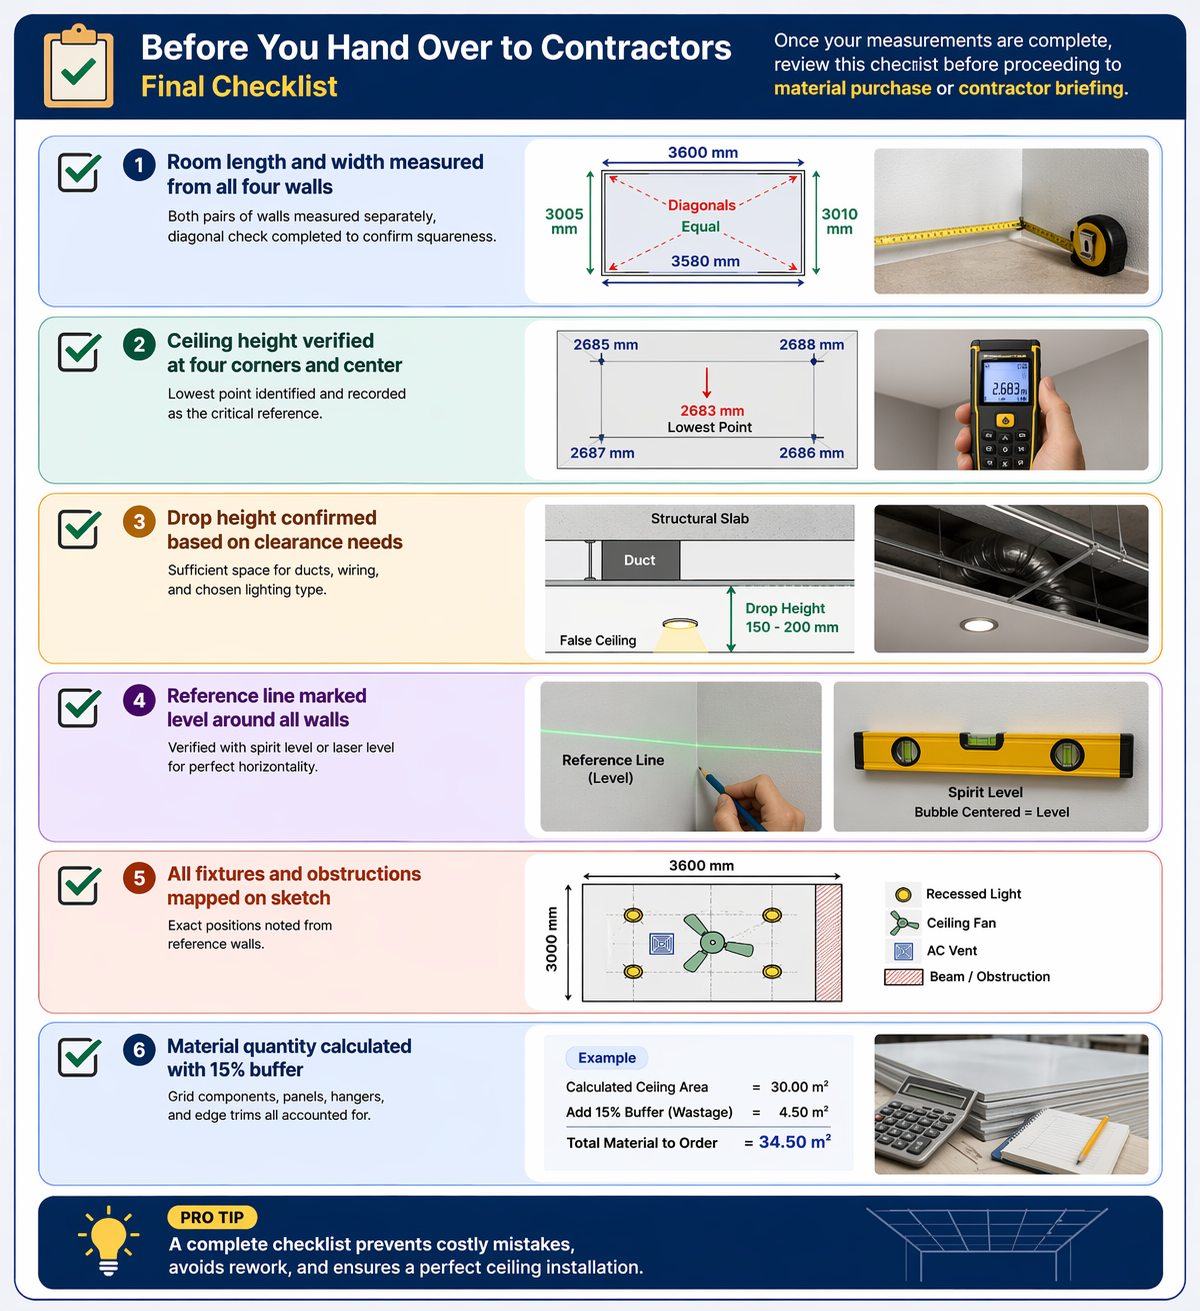
Using your lowest corner measurement, decide on your final false ceiling height. Snap a chalk line or draw a pencil line all around the room at this exact height. This becomes your installation reference. Use a spirit level or laser level to ensure the line is perfectly horizontal — even small errors here cause visible sloping.
Calculate total ceiling area
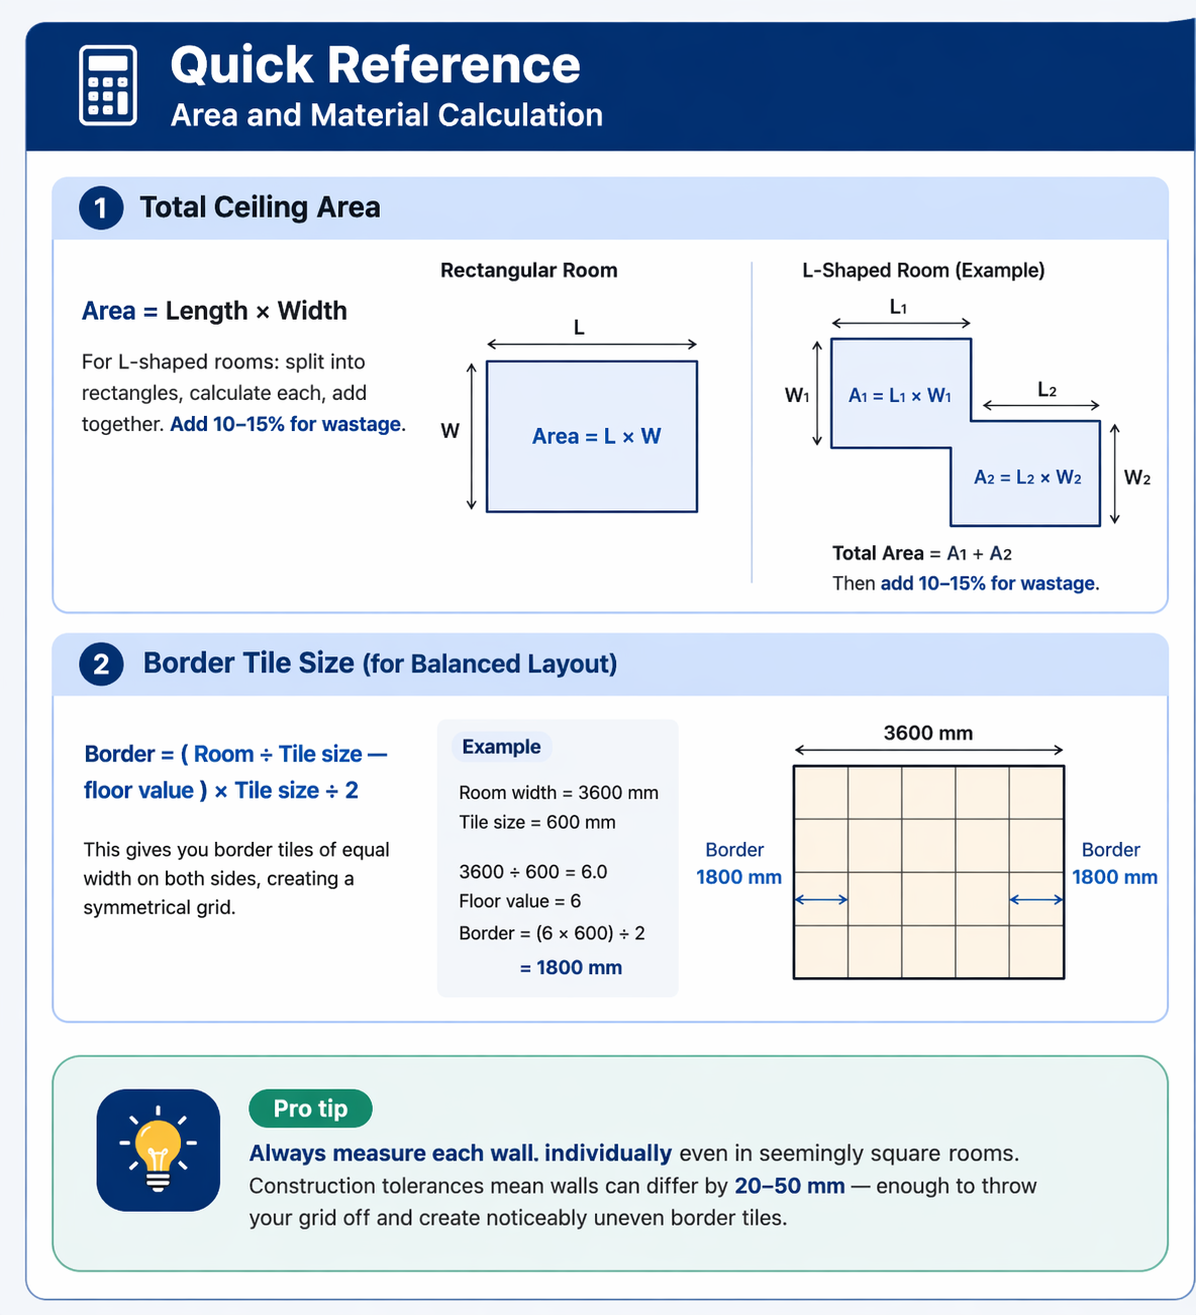
For a rectangular room, multiply length × width. For L-shaped or irregular rooms, split into sections and calculate each area separately, then add them together. Add 10–15% extra to your total as a wastage buffer for cuts, damaged panels, and off-cuts around edges and fixtures.
Mark the positions of fixtures and obstructions
On your sketch, note the location of ceiling fans, light points, air conditioning vents, and any pipes or beams. These affect where panels are cut and where extra structural support may be required. Measurements from walls to fixture centers must be recorded accurately.
Lorem ipsum dolor sit amet, consectetur aPlan the grid layout
Suspended ceilings use a metal grid framework. Plan your grid so that border tiles (partial tiles at the edges) are equal on opposite sides — ideally at least half a tile width — to create a symmetrical, professional look. Adjust the starting point of your grid accordingly using your room dimensions.dipiscing eli.